Setup Guide
This guide walks you through installing and configuring Truemed on your Shopify store.
Prerequisites
Before you begin, make sure you’ve completed:
- ☐ Uploaded your product catalog (Shopify CSV export with SKUs assigned)
- ☐ Connected your bank account via Stripe (see the Stripe Onboarding & Connection article)
- ☐ Confirmed your Stripe account is at least “Enabled”
- ☐ Ensured you have Shopify account owner or admin permissions
Step 1: Install the Truemed Payment App
The Truemed payment app is not listed on the public Shopify App Store. You will receive an install link from your Truemed contact.
- Click the install link provided by Truemed
- Review the app permissions and click Install
- You’ll land on the Truemed app settings page
.png "image (6)")
Do not activate the app yet if your Truemed coordinator has instructed you to wait. You’ll be told when it’s time to activate.
Step 2: Activate the Payment App
Once your Truemed account is configured and your products have been categorized:
- Return to the app settings page (or navigate to Settings > Payments > Additional payment methods and search for “TrueMed”)
- Click Activate
- Leave the Visa, Mastercard, and American Express toggles ON. This allows Truemed to process non-HSA/FSA cards when customers have insufficient HSA/FSA funds or their card is declined. We provide reimbursement instructions in these cases, and Truemed covers the credit card processing fees.
After activation, the Truemed payment option is live immediately. Customers can begin checking out with HSA/FSA funds right away.
Step 3: Install the Product Page Widget
The product page (PDP) widget is the highest-impact promotion you can add. It educates customers about HSA/FSA eligibility right where they’re making a purchase decision.
Installation
- Get your Public Qualification ID from app.truemed.com/merchants/qualifications or your Truemed contact
- In Shopify, go to Online Store > Themes > Customize
- Open your product page template
- Add a Custom Liquid block where you want the widget (typically near the price or “Add to Cart” button)
- Paste the following code, replacing
YOUR_PUBLIC_QUALIFICATION_ID:
Dark Mode
For pages with dark backgrounds, add the dark-mode attribute:
Show Widget Only on Eligible Products
Use Shopify product tags to control widget visibility:
- Tag products as
truemed-eligibleand addshopify-tags="display-if-eligible"to the div - Or tag ineligible products as
truemed-ineligibleand addshopify-tags="display-unless-ineligible"
Common Style Customizations
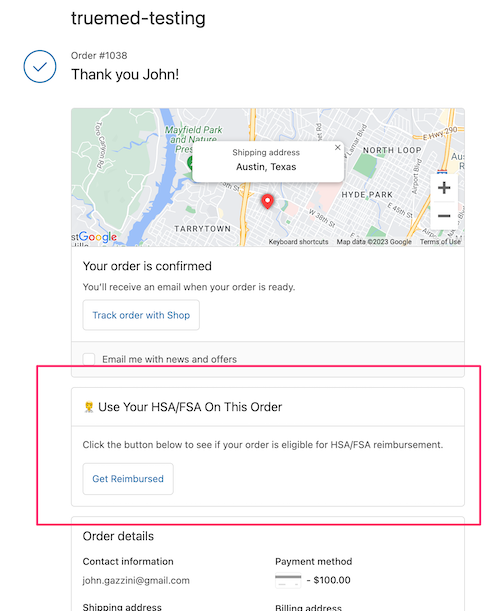
Step 4: Add the Thank You Page Widget (Hybrid/Subscription Merchants)
If you also sell subscription products, you’ll want to add the qualification link to your order confirmation page so customers can complete the reimbursement flow after purchase.
Option A: Checkout Extensibility (Recommended)
If your store uses Shopify’s Checkout Extensibility:
- Visit apps.shopify.com/truemed-extensions and click Install
- Follow the setup prompts and enter your Truemed Public ID
- Save your changes
Your Public ID is the last part of your Qualification Link, found at app.truemed.com/merchants/qualifications.
Option B: Additional Scripts (Legacy)
If your store has not migrated to Checkout Extensibility:
- Find your Qualification Link at app.truemed.com
- Go to Settings > Checkout > Additional Scripts
- Paste the following in the “Order status page” section:
Step 5: Add Qualification Link to Order Confirmation Email
Including the qualification link in your order confirmation email ensures customers who miss the Thank You page can still access it.
- In Shopify, go to Settings > Notifications > Order Confirmation
- Add the following snippet to your email template, replacing the placeholder with your qualification link:
Step 6: Add Checkout Messaging for Subscriptions (Optional)
If you sell subscription products, we recommend adding a checkout banner using the Checkout Blocks app so customers understand the post-purchase reimbursement process.
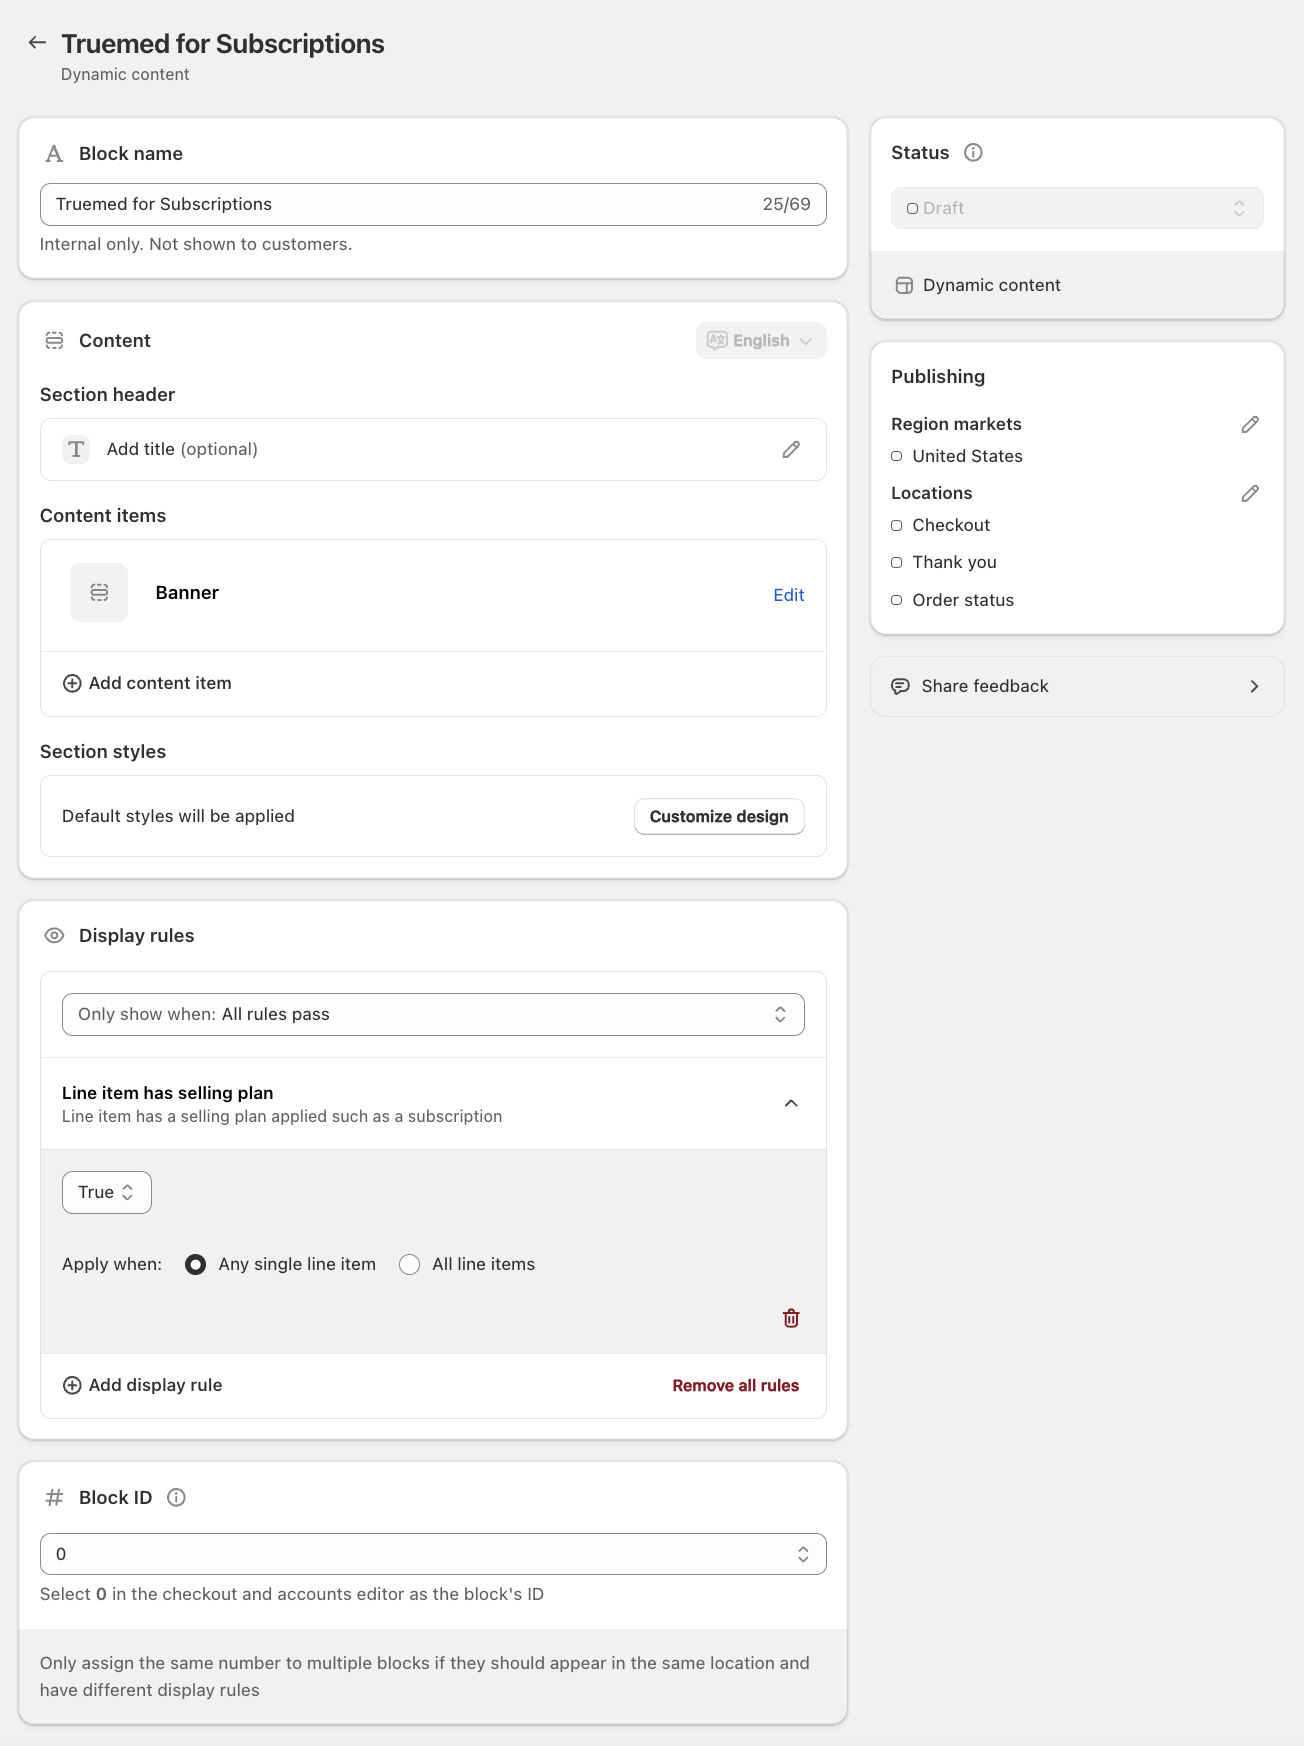
- Install Checkout Blocks from the Shopify App Store
- Create a Dynamic Content Block with a Banner template
- Set a display rule: show only when any line item has a selling plan (subscription)
- Use this approved copy:
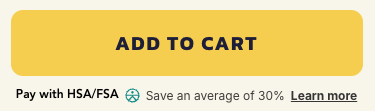
Title: Save an average of 30% when you use your HSA/FSA funds through Truemed.
Content: Once you’ve purchased, fill out the Truemed health intake form on your order confirmation page to check if you qualify for HSA/FSA reimbursement. HSA/FSA tax savings vary. Learn more at truemed.com/disclosures.
- Limit publishing region to United States
- Follow the Checkout Blocks setup guide to add the block to your checkout
Step 7: Verify Your Setup
After completing setup, run through these checks:
- ☐ Visit a product page and confirm the HSA/FSA widget appears
- ☐ Start a test checkout and verify “Truemed” appears as a payment option
- ☐ If applicable, add a subscription item to cart and check for the checkout banner
- ☐ Place a test order and verify it appears in your Truemed Dashboard
- ☐ Check your order confirmation page for the qualification link (if reimbursement flow is enabled)
Shopify Permissions Reference
To install and manage the Truemed payment app, you need one of the following Shopify roles:
Theme Compatibility
The Truemed payment app works with all Shopify themes. Changing your theme will not affect the payment integration. However, if you switch themes, you may need to re-add the product page widget to your new template.
Need Help?
- Technical issues: merchants@truemed.com
- Dashboard access: app.truemed.com
- Refer to the Shopify Issues article for common issues